


React Native is the well-known framework for building native mobile apps using JavaScript and leveraging ReactJS. It is well similar to ReactJS but not completely. In this article, you will find the proper step by step installation of React Native.
React Native apps may target iOS 13.4 and Android 5.0 (API 21) or newer.
Step 1: Install Node.js
First of all, You must check whether node.js >= 4.0 is installed on your computer, To check the version:
node -v
on the command prompt. The above command is used in both Windows and Linux.
Or else install the latest version of the node.js here.
Step 2: Install JDK
React Native requires Java SE Development Kit (JDK), make sure to install JDK 17 here. Under the hood, the React Native “bridge” invokes the native rendering APIs in Objective-C (for iOS) or Java (for Android).
Step 3: Install Native SDK
You have to choose native SDK's for specific platforms
For Android,
React Native uses Java for Android development. Download and Install Android Studio from the Official Website. Also don't forget to select
Android SDK
Android SDK Platform
Android Virtual Device (Optional)
To know more details about the compatible Android SDK, click here.
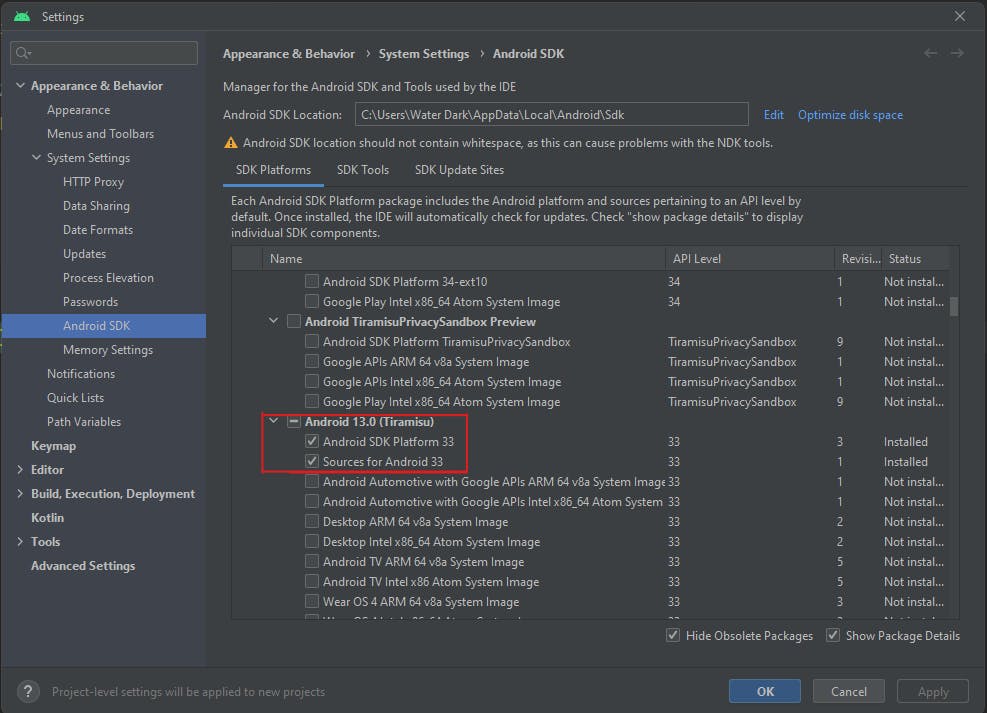
React Native requires Android 13 (Tiramisu) SDK to be installed. To check the SDK version follow the following:
Open Android Studio > Tools > SDK Manager > Android SDK > SDK Platforms > Make sure to select Android 13.0 (Tiramisu)
Now we are heading towards environment variable set-up:
Open the System Properties window:
Just type Environment variables in Windows search.
Select "Edit the system environment variables".
In the System Properties window, click the "Environment Variables" button.
Under the "User variables" or "System variables" section, click "New" to add a new variable.
Enter the variable name as
ANDROID_HOMEand value for your variable asC:\Users\your_user\AppData\Local\Android\Sdk.
Click "OK" to close each window.
For iOS,
Install Xcode, in your MacOS(as it is available only for Mac). It is free and probably it is preinstalled.
Step 4: Create your First React Native Project
If you ever installed react-native-cli globally, I recommend you to uninstall that, because instead of installing and managing react native cli specific version globally on your pc, you can create the project in the latest version at runtime using npx.
If you previously installed a global react-native-cli package, please remove it as it may cause unexpected issues. To uninstall the react-native-cli:
npm uninstall -g react-native-cli @react-native-community/cli
Now let's create a project MyFirstProject:
npx react-native@latest init MyFirstProject
@latest defines the latest version of react-native. npx is a package executer that is used to directly execute JavaScript packages without installing them.
Now your project is created with a default template. Run your project using:
npm start
This will start the metro development server for your project.
Make sure to connect your mobile or start the virtual device.
More detailed article about running the react native app, click here.